Security Systems  Central Vacuums  Satellite & Antennas  About Us  Contact Us  Links Audio/Video  Carpet Spot Removers  HOME  (719) 495-2715
Pictures 1 Back to Security Diagrams
Back to Security Systems
Black Forest Home Security Systems, the only company that gives you everyting you pay for: quality, craftsmanship and personal service. We know how to do it right and we care about doing it right!
Click for Music

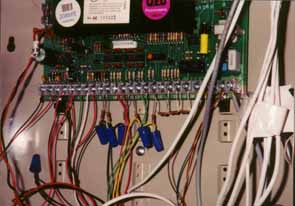
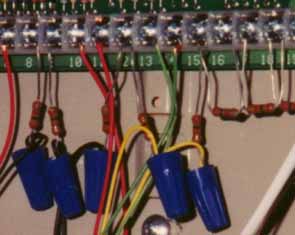
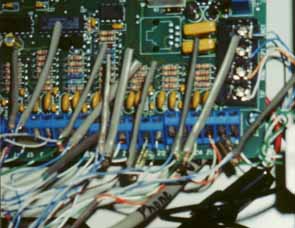
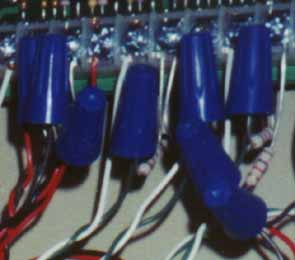
After reading the Security Diagrams page you know how end of line resistors are wired and that they should not be in the panel. Dave will now show you some of the "less than professional" installations he has seen, done by local security companies.

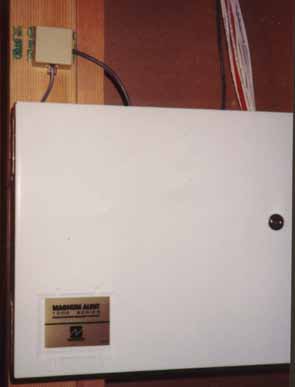
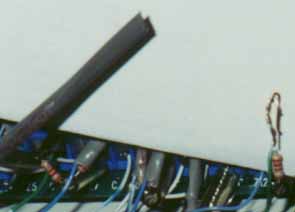
Most security systems house the main circuit board and standby battery in a metal cabinet with a locking door, like the one in this photo. How secure is this security system? The phone jack for the communicator is mounted OUTSIDE the locked metal cabinet, very convenient for a burglar to unplug. Also, notice in the upper right all the wires are exposed for someone to cut. How long would it take a burglar to defeat this system once he broke in? This system was installed by a local music system company.

To improve the security of this system, one could install cellular back up to send the


alarm signals out even if the phone jack were unplugged and the wires cut.

   Continued Below Left  

Inside the metal cabinet is the main control circuit board with the screw terminals for attaching wires.

Look closer and you will see the blue wire nuts attaching the wires to the brown end of line resistors. The other wire of each end of line resistor is under a screw terminal on the circuit board. This system was installed by one of the national security company affiliates.

Dave Easley does not like wire nuts for low voltage connections, he prefers to solder each connection and then slip a piece of
clear heat-shrinkable tubing over the joint. Since 1977 he has never had to go back and repair a solder joint. The resistors on the right are "terminating" unused connections and are OK to be in the panel.

   Continued Below Left  

When Dave first looked inside this control panel he wasn't sure what he was looking at. What were all those tubes sticking up?

The photo on the right shows the end of line resistor with the wires just twisted together--no wire nut and no crimp connector, just twisted together. This type of connection may last a few months to a

few years in our dry climate but eventually the wires will oxidize and the poor connection will cause false alarms. This

was in a million dollar home and was done by a local security company with over 20 years of experience. The tubes are pieces of the outer jacket of the telephone cable that was used to wire this system. The tubes were slipped over the twisted wires.

   Continued Below Left  

This is a system done by another local security company. Again, blue wire nuts and end of line resistors inside the control

panel. It is a shame that most security system installers in Colorado Springs either don't know or don't care about maintaining the proper supervision for their customers' security system wiring.

Let Dave do it right the first time!


There are more pictures on the pictures 2 page.

   BACK TO TOP